Choosing the Perfect Environment: Creating Optimal Conditions for Your Jelly Bean Plant
Alright, fellow green thumbs, let's dive into the whimsical world of jelly bean plants and how to create the ultimate environment for these delightful little darlings. First things first, these quirky plants thrive in bright, indirect light, so find them a cozy spot near a window without subjecting them to harsh rays. Now, let's talk temperature. Jelly bean plants are like Goldilocks, they prefer it not too hot, not too cold, but just right. Aim for a comfortable room temperature, and avoid placing them near drafty areas or heating vents that could make them shiver or sweat. As for watering, these little guys are not fans of soggy feet, so let the soil dry out a bit between waterings. But don't go deserting them for too long, they still need a drink every now and then. And remember, just like us, jelly bean plants appreciate a little TLC, so don't forget to talk to them, sing to them, or even tell them a joke or two. Who knows, they might just reward you with a burst of colorful jelly bean goodness!
Nurturing Growth: Essential Care Tips for Healthy Jelly Bean Plants
An interesting fact about caring for a jelly bean plant is that it is a succulent that thrives on neglect! Unlike many other houseplants, the jelly bean plant (Sedum rubrotinctum) prefers to be left alone rather than being constantly pampered. It is highly adaptable and can tolerate periods of drought, making it a perfect choice for busy plant enthusiasts or forgetful gardeners. So, if you tend to forget to water your plants or are often away from home, the jelly bean plant might be the ideal addition to your indoor or outdoor garden.
Let's embark on a jelly bean plant care journey, my fellow plant enthusiasts! To nurture the growth of these whimsical wonders, start by providing them with well-draining soil that allows their roots to breathe. Fertilize them with a balanced, water-soluble fertilizer once a month during the growing season to give them that extra boost. Now, let's talk about grooming. Just like a fabulous haircut, jelly bean plants benefit from occasional pruning to maintain their compact shape and encourage new growth. And don't forget to keep an eye out for any unwanted pests that might try to crash the jelly bean party. If you spot any intruders, show them the door with organic pest control methods. With a little love, care, and a sprinkle of magic, your jelly bean plant will flourish and bring joy to your botanical kingdom!
Troubleshooting Common Issues: Solutions for a Thriving Jelly Bean Plant
Let's face it, even the most experienced plant parents can encounter some bumps along the jelly bean plant care journey. But fear not, my fellow green thumbs, for I am here to help troubleshoot those common issues and guide you towards a thriving jelly bean plant. First up, let's talk about yellowing leaves. If you notice your jelly bean plant's leaves turning yellow, it could be a sign of overwatering. Give your plant a break from the watering can and allow the soil to dry out before giving it a moderate drink. On the flip side, if the leaves are crispy and brown, it's a cry for hydration. Give your plant a good soak, ensuring the water reaches the roots, and consider misting the leaves to increase humidity.
Another common issue that may arise is leggy growth. If your jelly bean plant starts stretching towards the light, it's a sign that it's not getting enough of it. Move your plant to a brighter location or consider supplementing with artificial grow lights. Additionally, pinching back the leggy stems can encourage bushier growth and help maintain a more compact shape.
Now, let's address the dreaded pest problem. If you spot tiny invaders like aphids or spider mites on your jelly bean plant, it's time to take action. Start by gently wiping the leaves with a damp cloth to remove any pests. For a more stubborn infestation, try using a homemade insecticidal soap or a natural pest control solution. Remember to regularly inspect your plant and act promptly to prevent the pests from spreading.
Lastly, let's talk about leaf drop. If your jelly bean plant starts shedding leaves, it could be due to environmental stress or inconsistent watering. Ensure your plant is in a stable environment with consistent temperature and humidity levels. Keep an eye on the watering routine, making sure not to over or underwater. With a little patience and some adjustments, your jelly bean plant will bounce back and continue to bring whimsical joy to your space.
Remember, troubleshooting is all part of the journey of caring for your jelly bean plant. Stay observant, be proactive, and don't be afraid to experiment with different solutions. Your efforts will be rewarded with a thriving and enchanting jelly bean plant that will bring a smile to your face every day.
Propagation and Expansion: Propagating and Repotting Your Jelly Bean Plant
Fun fact: Did you know that caring for a jelly bean plant involves giving it a little 'sweet treat'? These plants, scientifically known as Sedum rubrotinctum, have leaves that resemble colorful jelly beans. To keep them healthy and happy, make sure to provide them with plenty of sunlight, as they thrive in bright, indirect light. Additionally, when watering your jelly bean plant, try using a diluted solution of water and sugar occasionally. The sugar acts as a natural fertilizer, giving your plant a little extra boost and enhancing its vibrant colors. Just remember not to overdo it, as too much sugar can be harmful. So, next time you care for your jelly bean plant, don't forget to give it a sugary surprise!
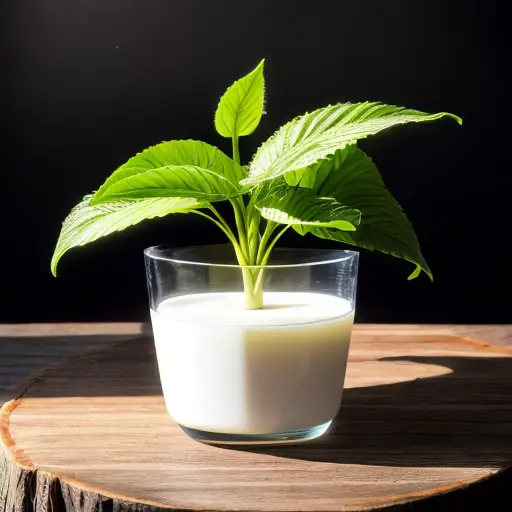
Ready to expand your jelly bean plant family? Let's dive into the world of propagation and repotting! Propagating jelly bean plants is a breeze, as they readily root from stem cuttings. Simply snip a healthy stem, remove the lower leaves, and place it in a glass of water. Once roots have formed, transfer the cutting to a well-draining potting mix and watch it grow into a new plant. As for repotting, jelly bean plants appreciate a cozy space, so when their roots start to outgrow their current pot, it's time to give them a roomier home. Choose a pot that's slightly larger, fill it with fresh potting soil, and gently transfer your plant, ensuring the roots are covered. With a little propagation and repotting, your jelly bean plant family will flourish and bring even more whimsical charm to your botanical kingdom!